Mastodon Verification Link Blog – Sam Seltzer-Johnston

Feb 24, 2017

Orx Map Format: Part 4

Hotloading is done. Woo hoo! Not only that, but I’ve boiled this down to a pure C solution. I had a pretty attrocious C++ class doing too many things. It now exists as a few structs and less than a dozen functions. I plan to add a C++ wrapper later on.

Turns out I was very wrong about hotloading. There’s currently no way to detect individual property changes via event handler, but you can detect when a file is modified. This means if you do your own book-keeping, you can detect those changes yourself. I’ve got a naive solution that blindly reloads the map, but I’m well positioned to put something better together. I haven’t decided just how in-depth I want change detection to go, so I’m going to put that on the backburner for a little bit.

There are a few gotchas regarding hotloading that iarwain was kind enough to point out to me. My use-case even reminded him of a known issue. He then went ahead and fixed it. What a guy.

Here’s a video of it:


Feb 21, 2017

Orx Map Format: Part 3

I know I said last time I’d do the shader stuff next, but I decided to first implement a primary feature that I’ve been putting off: arbitrary object placement. NOW WITH OBJECTS! Above you can see there are a couple new things here. Another guy being spawned, and to his left, some little overlapping sprites that can be found separately on the next platform down.
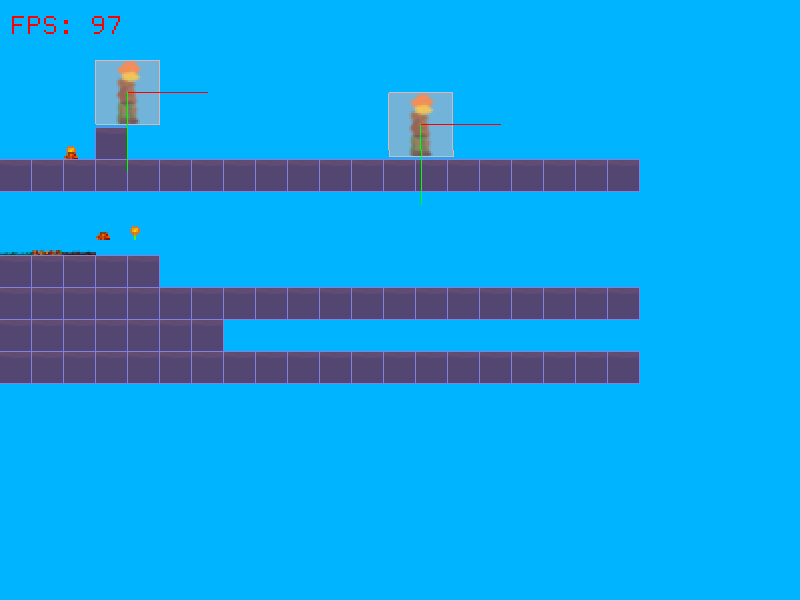
Here’s a look at the config.

[MyCoolMapLayer@MapSectionBase]
Map = "


    ee ee ee aa
    aa aa aa aa aa aa aa aa aa aa aa aa aa aa aa aa aa aa aa aa

    ab ba os ff gg
    aa aa aa aa aa
    aa aa aa aa aa aa aa aa aa aa aa aa aa aa aa aa aa aa aa aa
    aa aa aa aa aa aa aa 
    aa aa aa aa aa aa aa aa aa aa aa aa aa aa aa aa aa aa aa aa
" 
(3, 0, 0) = Guy
(2, 4.5, 0) = TileG # TileF

Above we have the same map definition described in my first post but with a list of keyvalues at the end. This was actually a suggestion by iarwain, the author of the Orx engine. I didn’t know I could use vectors as keys initially, but once he pointed that out I was all like “holy smokes this is great!” and the townspeople rejoiced.

Anyway, it’s a mapping of position -> object list, which as you may have guessed, spawns a list of objects at a position. Orx config files delimit lists with the # character. My code reads these lists, creates valid objects, and places them at the position specified by the key. I think it’s pretty slick.

Another noteworthy property here is that those vectors are specified in grid units, which happens to be arbitrary. You could forego having a Map keyvalue and simply use this as a convenient way to place objects. You can change your grid size later and object placement will scale with it. Or maybe you set your grid size to the size of your frustum so that placing an object at (0.5, 0.5, 0) puts it in the center of your screen. Technically that wouldn’t work perfectly right now, but it’s a valid use-case that would be trivial to implement. I think. Anyway I really like how this is shaping up.

I’ve also decided how I’m going to approach the tile rendering step. One big unknown for me was whether to require a pre-packed texture for all tiles in a map (so that the shader can index them) or build a packed texture on the fly by using a combination of the textures specified by the tiles. I’m going to shoot for the latter. I may start by going the pre-definition route, but I’m going to code it with dynamic texture packing in mind.

But before that (oh no he’s putting it off again!) I’m thinking it may be a good move to implement hotloading. This would mean as soon as I save a change to a map in the configuration file, it updates in-game. At runtime. Hotloading configuration files is one of Orx’s cool features that blurs the line between game engine and editor toolkit. I’ve never utilized it before so I’m not sure what the implications will be on my implementation. It’d be nice to have an optimal reload time so it doesn’t repeat more work than it has to. I’ll start with a naive implementation where it reloads everything, but I’m hoping that from there I can narrow it down to reloading only exactly what’s needed. Doing that last could be catastrophic if I make too many assumptions along the way.
Feb 20, 2017

Orx Map Format: Part 2

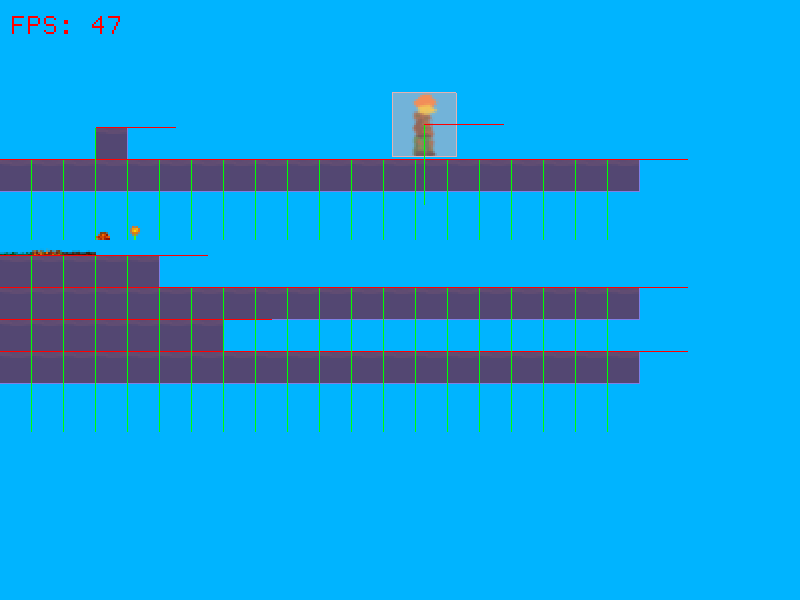
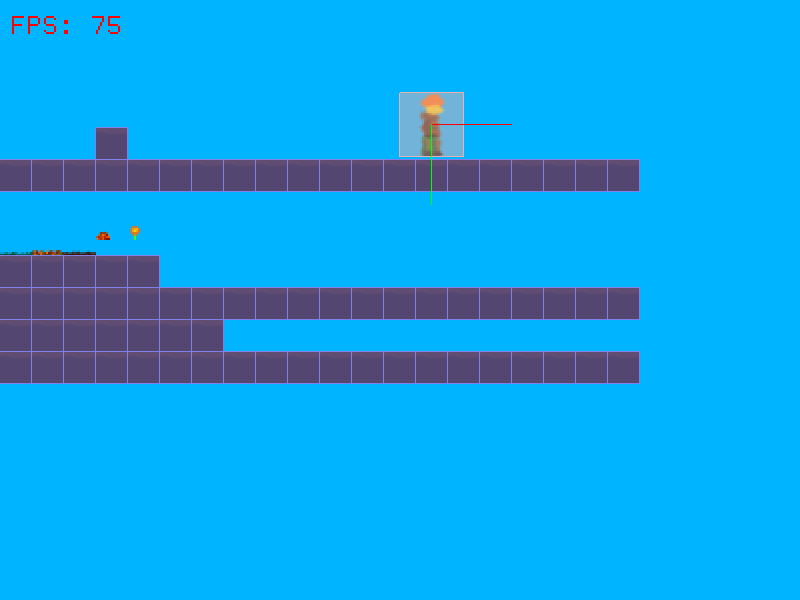
This morning I updated my Orx Map code/format to support body parts. This gave me more than a 50% FPS boost. It’s still spawning objects for each tile, but those tiles no longer have a Body. They have their Body Part description added to a single world Body. Here’s a before/after. Before After

Much better.

There are a few things related to this that still need to be implemented. It currently only supports box-shaped body parts. I’d like to support sphere and polygon as well, just for completeness. There are some implementation details that bother me as well, but I won’t get into that for now.

The last step toward ridding myself of these tile objects is to use a shader for rendering them.

Read More

Feb 19, 2017

Orx Map Format: Part 1

Most recent tinkering I’ve been up to is a format for defining maps for Orx that supports tiles and arbitrary object placement. This is my first progress update. First off, here’s a generated map with physics debug info. Sample

Let’s look at the format I’ve devised so far:

[TileDefs]
aa = TileA
ab = TileB
ba = TileC
os = TileD
ee = TileE
ff = TileF
gg = TileG 
12 = TileH

[MapSectionBase]
GridSize = 16
Tiles = TileDefs

[MyCoolMapLayer@MapSectionBase]
Map = "


    ee ee ee aa
    aa aa aa aa aa aa aa aa aa aa aa aa aa aa aa aa aa aa aa aa

    ab ba os ff gg
    aa aa aa aa aa
    aa aa aa aa aa aa aa aa aa aa aa aa aa aa aa aa aa aa aa aa
    aa aa aa aa aa aa aa 
    aa aa aa aa aa aa aa aa aa aa aa aa aa aa aa aa aa aa aa aa
" 

Here’s a breakdown of each section.

  1. TileDefs is a mapping of identifier -> ConfigSection, where identifier is what’s later used in the Map keyvalue. The ConfigSection references a configuration section that can have a Graphic and/or a Physics Body.
  2. MapSectionBase is technically optional, but is a convenient configuration parent section that takes advantage of Orx’s config inheritance feature. I use it to define default map specs.
  3. MyCoolMapLayer is a child that inherits MapSectionBase and simply defines the tilemap layout. The intention is to create multiple layers.

The Map keyvalue has the following properties.

  1. Horizontal whitspace only acts as a delimiter. It is otherwise ignored.
  2. Line breaks increment the tile row and reset the tile column.
  3. Invalid tile identifiers will count as an empty tile. That is, they simply increment the tile column.
  4. Valid tile identifiers place a tile at the current row/column and increment the tile column.

And finally in code:

loadMapData("MyCoolMapLayer");

I’ll share the code for loadMapData later. I still have a lot of features I’d like to add. It’s got a very naive implementation where each tile is represented by an object, which explains the low FPS. I plan to pack tiles so that they may be rendered using a shader, and bundle all physics bodies into one combined set of body parts.

Again, lots more to do, but this should give a basic idea of where I’m going with this. I hope to post another update soon.


Feb 12, 2017

GDC 2017 Prep: Business Cards

This will be my third year attending the GDC, and it’ll be my second time ordering business cards. I’m not going to pretend like I’m an expert, but I learned a lot last time I printed my cards. By comparison, this time was a walk in the park. I think this is a great opportunity to share that learning experience with anyone who needs to go through this process for the first time and doesn’t know where to start. GDC 2017

Business cards are like currency at the GDC. It’s more or less expected that you’ll be exchanging them with every single person you meet. I have lots left over from the past two years, but this year I plan to be interacting with more Japanese developers. As such, I’ll be printing a second set of cards in Japanese.

If you’re going to be doing an exchange with 日本人, there’s a great deal of etiquette you may wish to follow. For starters, having Japanese (or at least bilingual) versions of your business cards is a plus. If you’re curious about other etiquette associated with exchanging cards, ask your favorite search engine. It’s really fascinating.

Let’s walk through my steps taken from 2 years ago. I had 2 weeks before GDC and based on average turnaround for print shops I decided I had about 2 days to design a card for myself.

Design Process

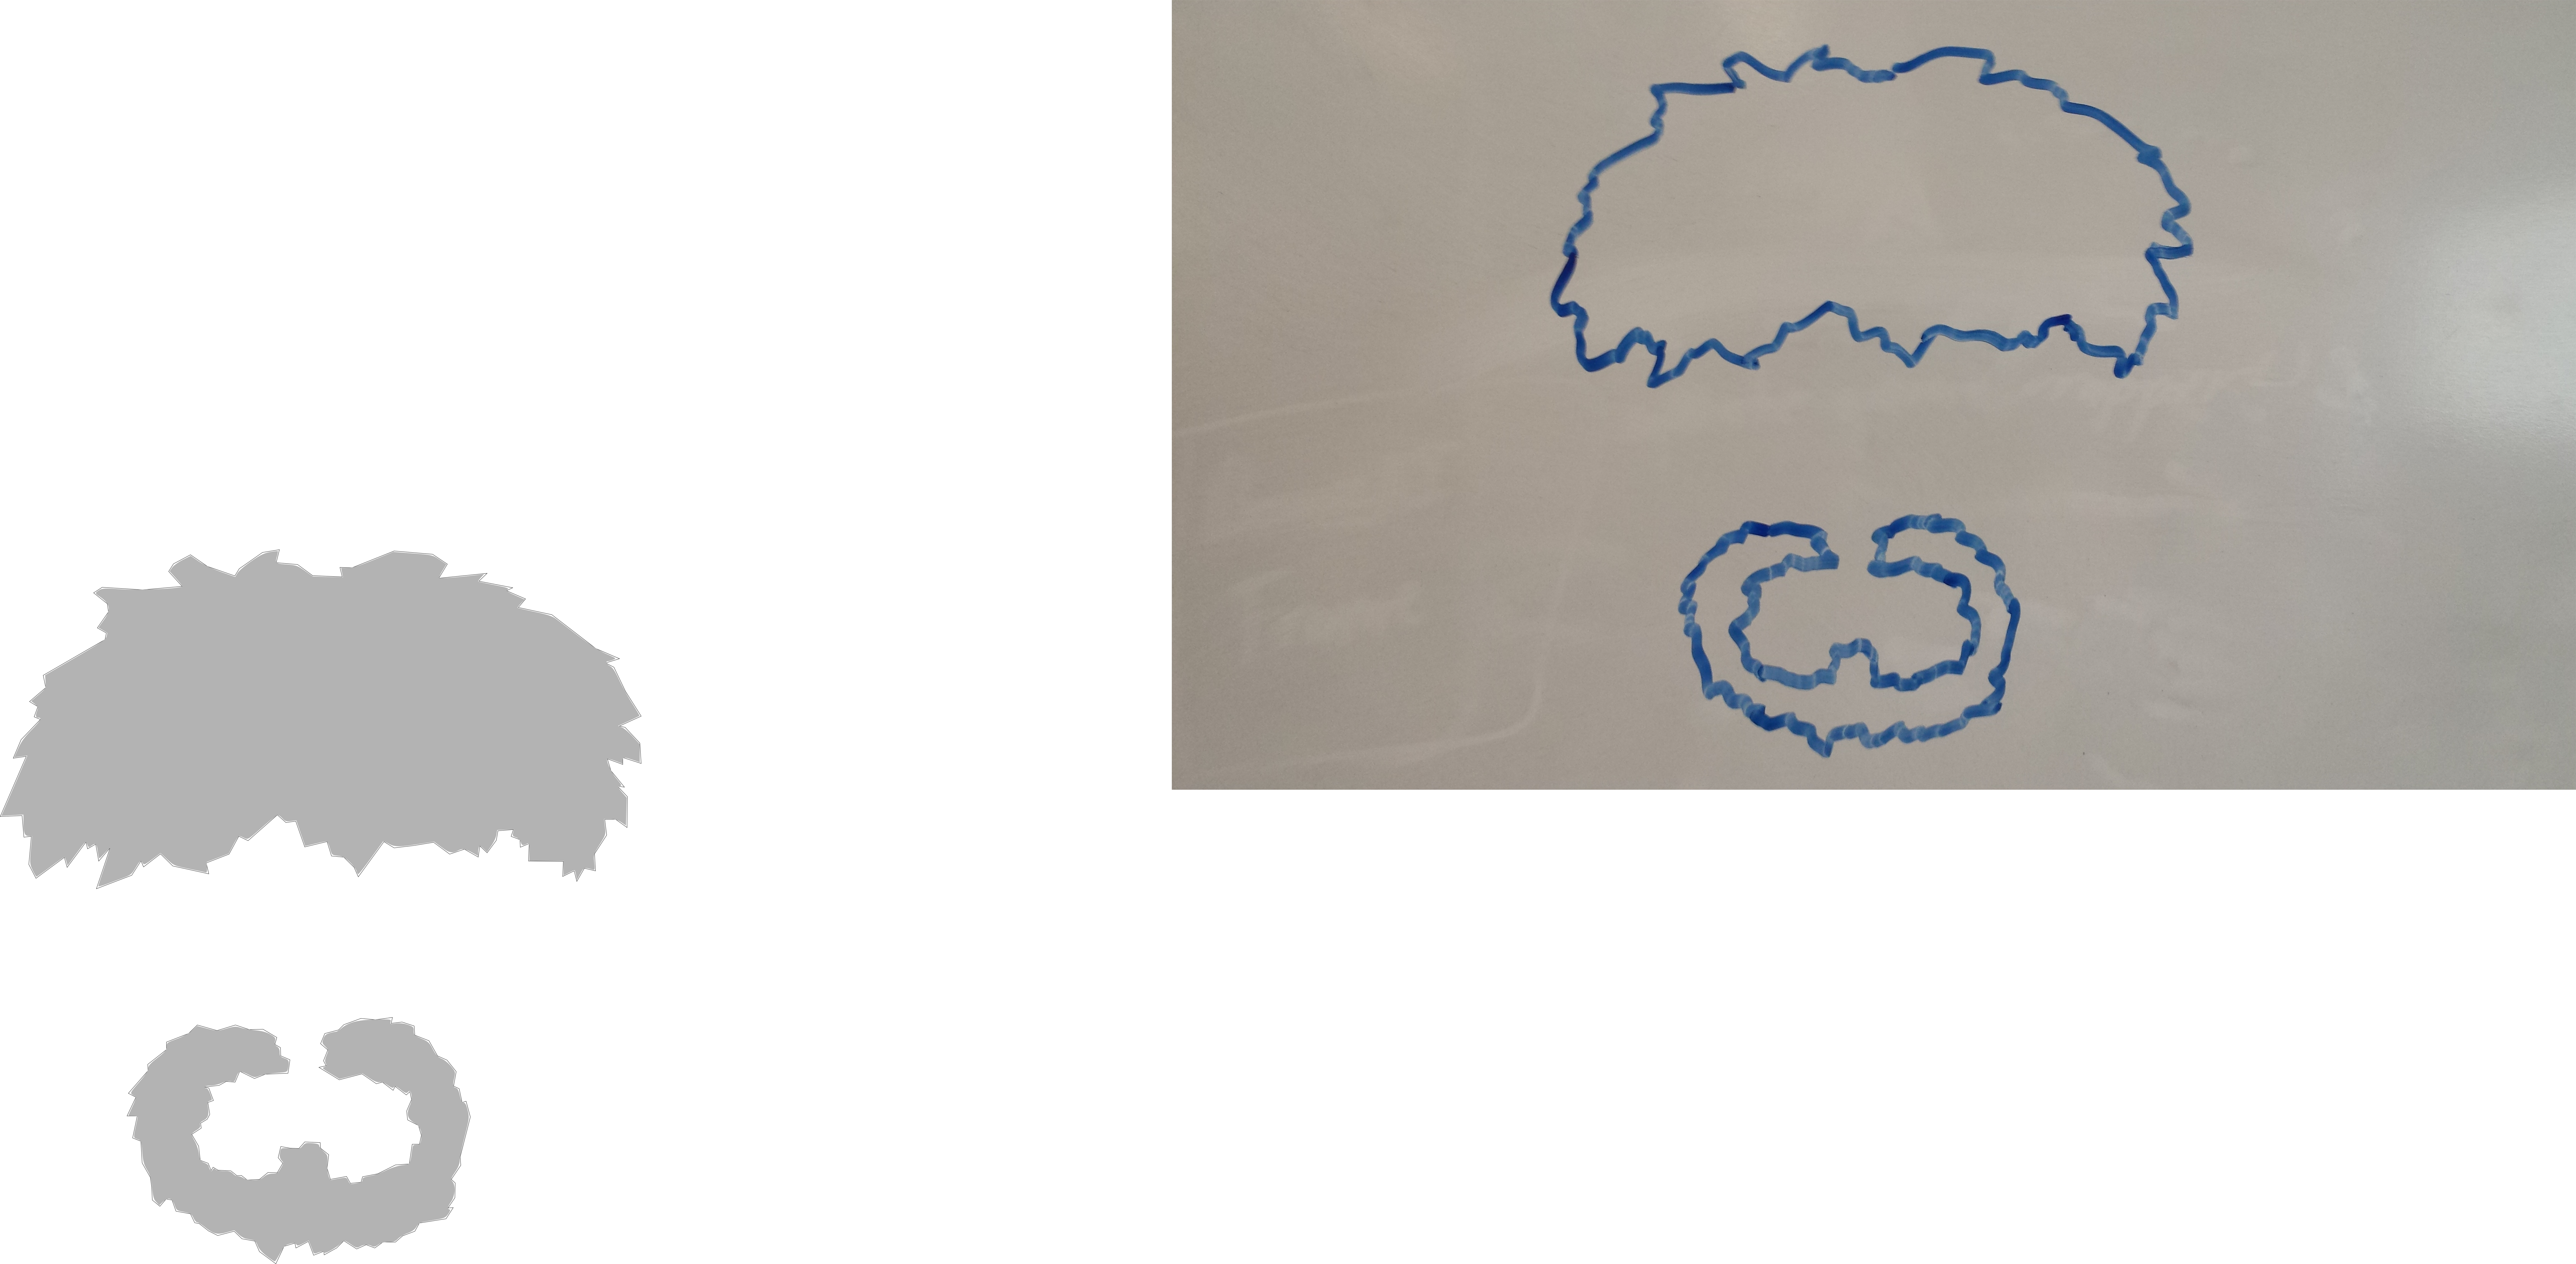
My first step was to choose a way to brand myself. Think of what helps people to remember you or the company you represent. In my case, I wasn’t representing anyone but myself. People have always said my hair is what they use to remember me. I can’t blame them. So that’s how we end up with this.

Logo

The top right is a sketch I scribbled on a whiteboard in about 30 seconds. I snapped a picture, loaded it into Inkscape, and traced it with a vector outline. I then did a simple fill and viola! Instant silhouette. That’s how we get the bottom left logo.

Editor Tips

Before starting on a card design, it’s a good idea to prepare yourself accordingly. Here are a few straightforward tips if you’re a DIYer like myself.

  1. Find some print shops first and download their business card templates. For printing there’s usually a trim zone, a bleed zone, and safe zone. All important content (like text and logos) must be in the safe zone. Print templates outline these for you.
  2. Use an image editor that allows layers. This allows you to make your first layer the print template. You can then set its alpha (opacity) to maybe 70% and toggle it to check if your design fits well.
  3. Dedicate a layer to anything you consider a separate element. This makes editing later and toggling parts of it much easier. In my case there are 6 layers on the front side (see below). The template, the header background (that blue top part), my name, my title, my logo, and my contact info. I later added 2 extra layers for my Japanese name/title, making for a total of 8 layers now.
  4. Always keep an easy-to-edit copy lying around. I use Paint.net, so I always keep the .pdn files handy. This made creating a Japanese version super easy over 2 years later.

My Design

Then I went about making the front and back sides of the card. I wanted them to resemble the color scheme of this website, which had come into existence not too long before making the card.

Back

Front

It’s uncommon to do a portrait orientation for a business card. Most are landscape orientation. The reasoning here is that when someone is reviewing a stack of cards later, they will need to rotate yours to read it. It stands out. It helps people remember you, and getting people to remember you is the name of the game.

To the right is the back side of my card. Many people will leave this blank, but in my case I added what I think to be a cute joke.1 Yet another thing to make myself memorable.

But wait… it’s empty? Indeed, this is a space for the recipient of my card to fill out. It’s common for people to write notes on business cards, particularly to help remember talking points, what you looked like, etc.2 Anything that helps in writing a personalized follow up email later.

And without further adieu, here are the English and Japanese versions side by side.

Front JA

Front

A misnomer here is that the job title on the English one says Game Developer while the Japanese one says Game Programmer. I figured being more descriptive may help alleviate whatever inevitable language gaps there are.

Card Stock

Next up is choosing card stock. I highly recommend using an uncoated stock (no finish). Many places offer gloss/matte finishes, but these are more difficult to write on. I almost always forget people with glossy finishes, and similarly with matte. The uncoated cards are easy to write on, provided there’s some white space. Indeed, it is no coincidence my card has plenty of white space. Choosing a relatively thick stock also gives your card a sturdy feel. It’s nice and tactile, which reflects well on you, strangely enough.

Ordering Cards

So the big gotcha about ordering any printed materials is that many printers prefer the CMYK colorspace. Most images are saved in RGB. Some sites will automatically convert for you, but it’s hard to know what kind of color shifting will take place. The thing is, when you convert to CMYK some colors will appear darker on a computer screen, but once on paper they tend to look normal again. Pretty odd concept.

Try throwing some images through a CMYK converter and see how they turn out. They will never look exactly the same, but that’s totally fine. Just make sure the converter knows what your card finish is so that it can intelligently convert colors.

Review

So here are some basic principles I suggest you adhere to when making a personal business card.

  • Brand yourself. Stand out and make it memorable.
  • Scribble friendly. Make your card easy to write on. Plenty of white space, sturdy uncoated card stock, etc.
  • Use a good image editor that supports layers and load up your print shop’s template as a starting point.
  • Don’t forget to check if CMYK is required by your print shop, online or otherwise. Be sure to tell your converter what card stock you’re using.

Hope this saves someone else the hassle of researching in an 8 hour frenzy. If you’re looking for a good print shop with a quick turnaround, check out UPrinting. It’s what I used, but there are many options out there. Do some research and compare prices/options yourself if you’re unsure.

  1. For those of you who are not programming-savvy, it’s a header file with my name. Header files are what the C/C++ languages use to list out functions, classes, and other parts that make up a program without actually implementing any logic. These files are often filled with comments, text that is ignored by the compiler, to document the code. The slashes and asterisks represent one such comment block. 

  2. Don’t do this in front of people, especially if you’re doing a formal Japanese exchange. It can be considered a sign of great disrespect. 


Newer
4 / 9